
Installing a Dash Cam in a Mitsubishi Outlander is fairly straightforward. I installed a front and rear 70mai dash cam in my 2019 Outlander and once I worked out how to run the cables to the rear camera it only took a few hours.
My Outlander Dash Cam Choice
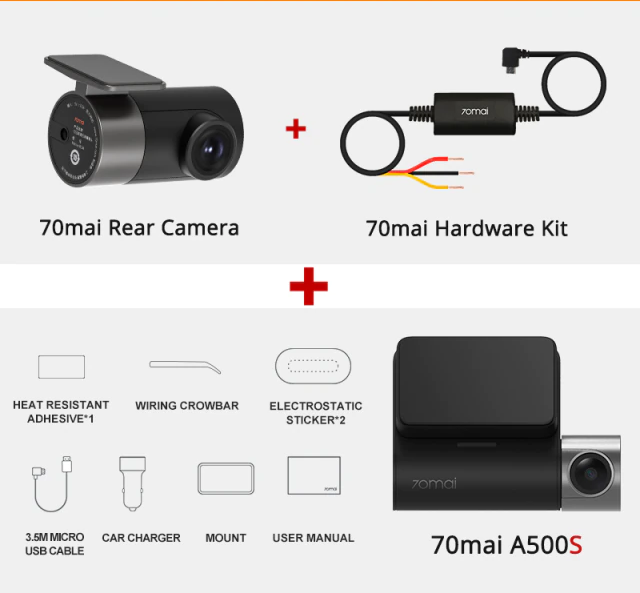
Having used a 70mai branded camera in my Nissan Leaf I decided to use the same camera in the Outlander. This time I went for the 70mai Pro Plus+ because it allowed the connection of a rear camera, all recording on the same unit.
- 2” LCD Screen
- 2.7K Resolution & 5-megapixel Camera
- Advanced Driver Assistance System
- Parking Mode Monitor
- Voice & App Control
- Rear camera (optional)
- Hardwire kit (optional)
To save footage I opted for a Kingston High Endurance 64GB microSD card. This card is designed to work with devices that continuously record. High endurance cards are also available from SanDisk, Integral and Transcend. Please avoid buying flash memory from eBay as there are too many shoddy fakes out there.
Switched 12V and Parking Mode
If you provide the 70mai with switched (ignition on) 12V the camera knows when the car is turned on and off. A permanent 12V allows it to stay active while you are parked. If it detects an impact it can record some footage and hopefully catch the person who bumped your car. If you don’t want parking mode you only need to provide the camera with switched 12V (live when the ignition is on).
Hardwire Kit
If you want to use parking mode I would recommend the hardwire kit. The camera comes with a power cable and 12V cigarette/aux adapter but I didn’t want any cables to be visible. So I purchased the “hardwire kit”. This needs to be connected to the fuse box with three wires.
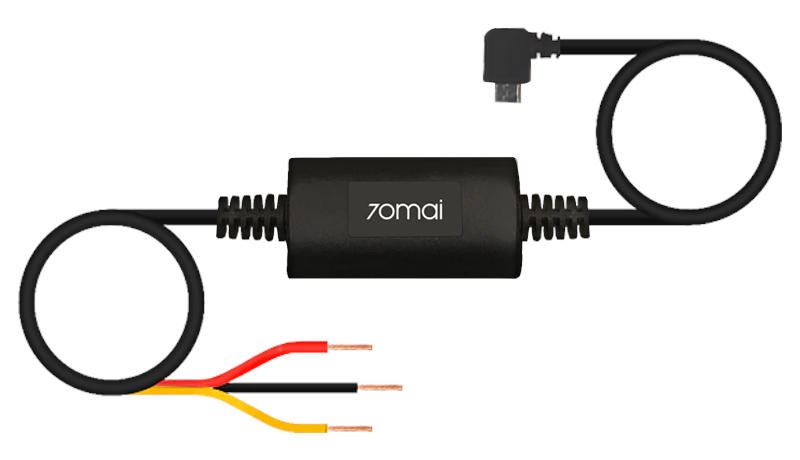
The black box converts the 12V from the car to the 5V required by the camera(s). It also shuts off all power if it detects the car battery voltage dropping too low which saves you from a flat battery.
They expect you to poke the wires behind some fuses with no other fittings. For a better installation I decided to use a couple of “fuse taps” and purchased these from eBay.
Fuse Taps
Fuse taps allow you to extract a 12V feed from the fuse panel via a small fuse, while still allowing the original fuse to power it’s original circuit. I used two. One to provide permanent 12V and another to provide 12V when the ignition was on.
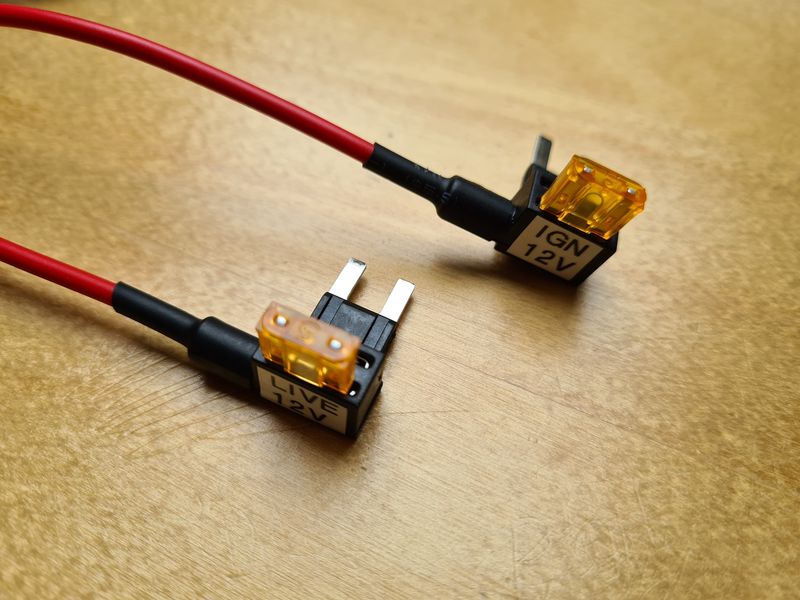
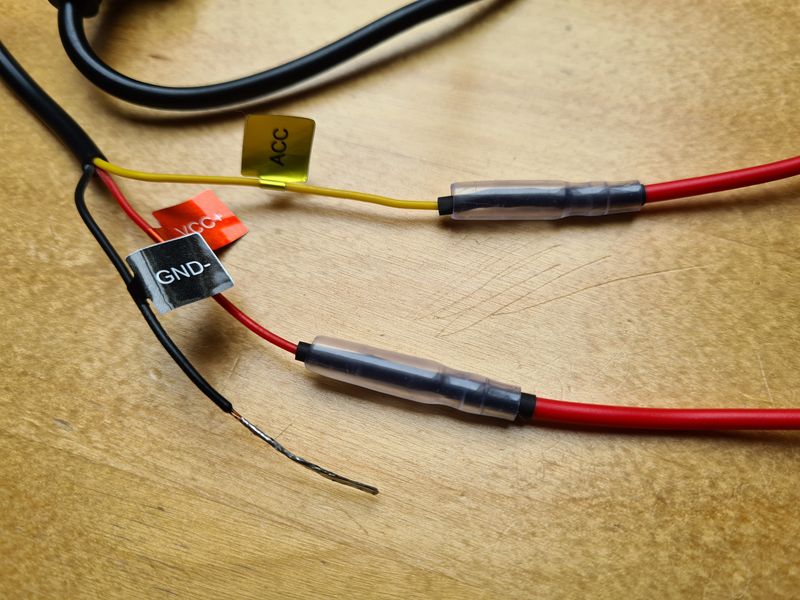
The two fuse taps were soldered to the red (permanent 12V) and yellow (switched 12V) wires on the hardwire kit. Black heat-shrink tubing was used to insulate the soldered joint.
The 5A fuse is orange and fitted closest to the wire. The original fuse pulled from the fuse panel goes in the slot nearest the metal tabs. In the photo below it was the 15A fuse I pulled from Fuse 7.

Outlander Glove Box Removal
The Mitsubishi Outlander fuse box in the Right hand drive model is behind the glove box. You can remove the glove box easily using the instructions in the user guide.
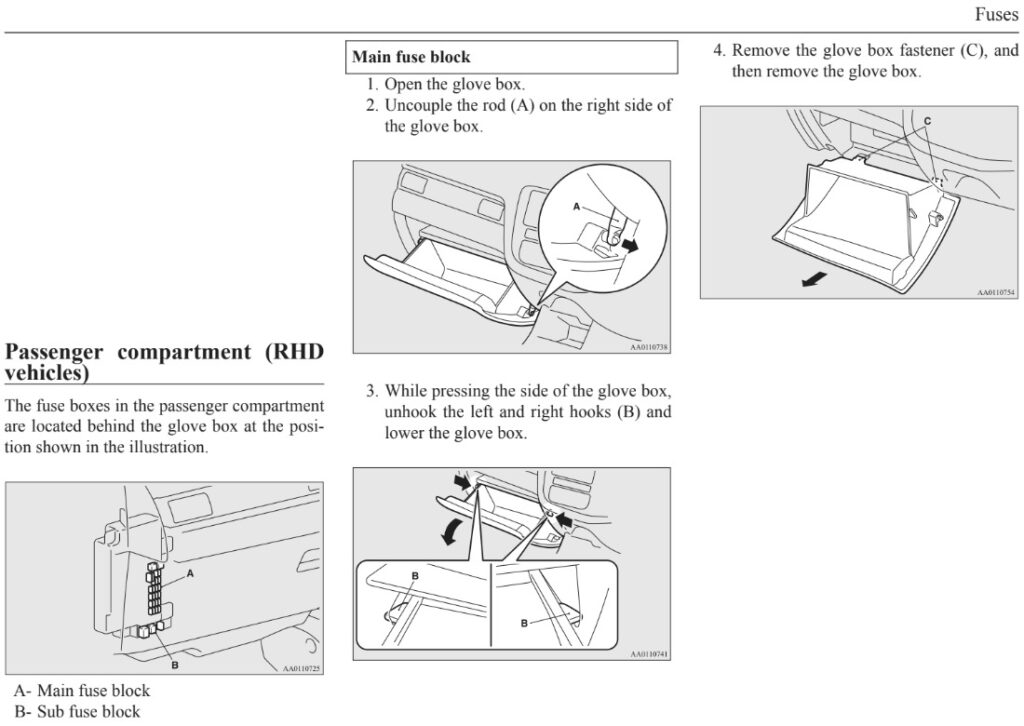
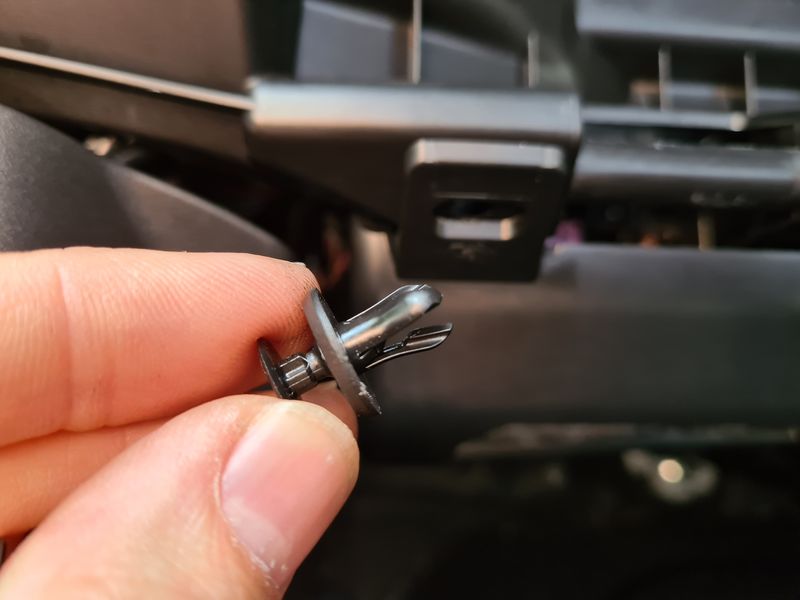
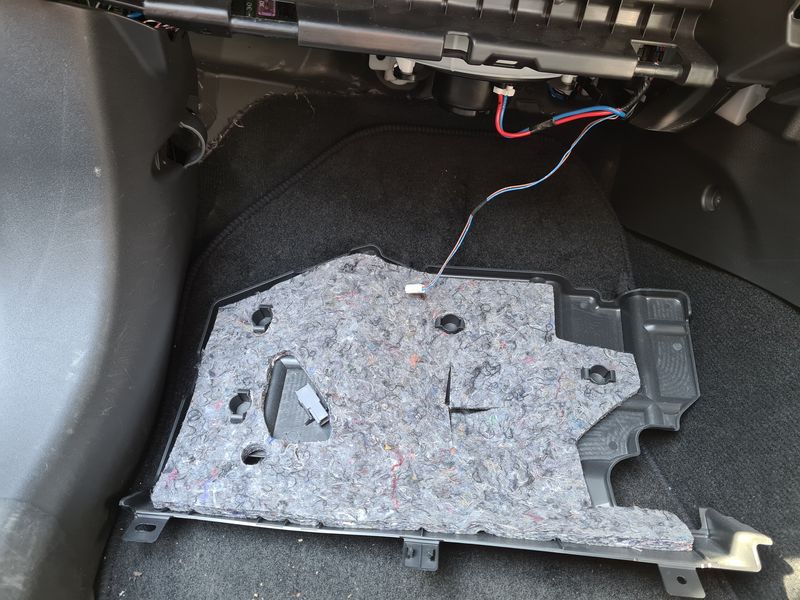
Once the glove box has been removed there is a plastic panel to remove. It’s easy once you remove the two fasteners by gently levering out the centre of the clip.
There is an LED connector you have to disconnect to allow the panel to be moved out of the way.
Outlander Fuse Box
The fuse panel behind the glove box looks something like this:
Fuse 7 is permanent 12V. This is connected to the red wire on the hardwire kit.
Fuse 23 is switched 12V. It is only on when the ignition is on and is connected to the yellow/amber wire on the hardwire kit.
Here are my fuse taps plugged into the fuse panel with the original fuses added:
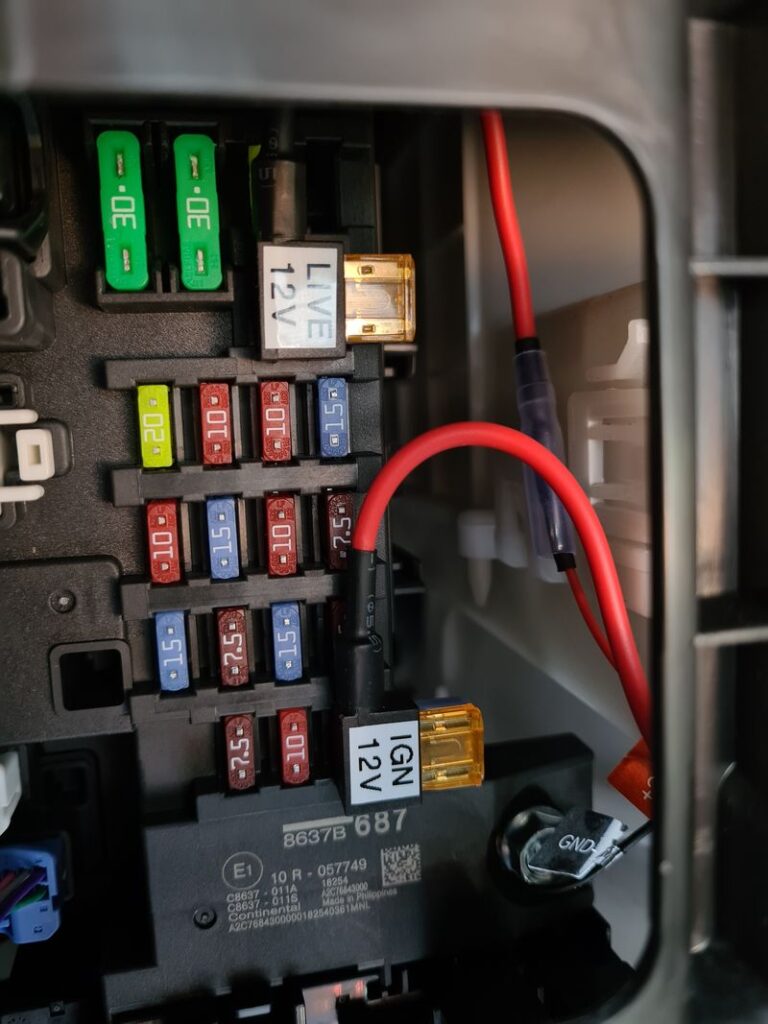
In order to correctly pull current from the battery through the fuses you need to put the fuse taps in the correct way around. The battery side of the fuse socket is the lower connection. So inserting the fuse taps as shown in the photo ensures the current flows from the battery and through the 5A fuse to the dashcam.
The ground (black) wire from the hardwire kit was wrapped around the bolt in the bottom corner of the fuse panel. It’s awkward to loosen and tighten up but worth getting right.
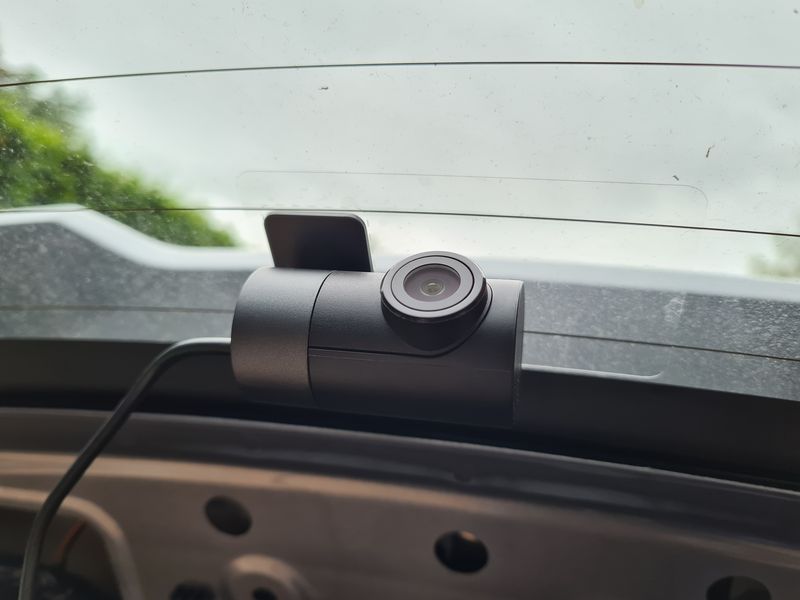
Front Outlander Dash Cam
The front camera fits nicely behind the rearview mirror. This does mean the screen is not very visible from the drivers seat but I prefer it that way as it doesn’t then impair visibility.
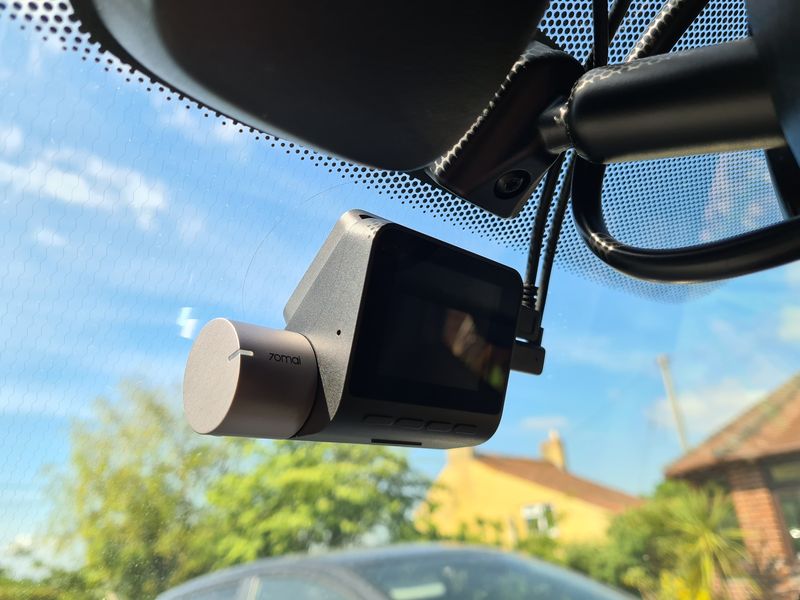
The 70mai cameras come with antistatic stickers. You stick these on the window and then stick the camera mount onto the sticker. The front camera can be removed from its mounting plate by sliding it up a few millimetres. For this reason I made sure I stuck the mounting plate 10mm from the nearest bit of existing plastic.
Front Camera Cable Routing
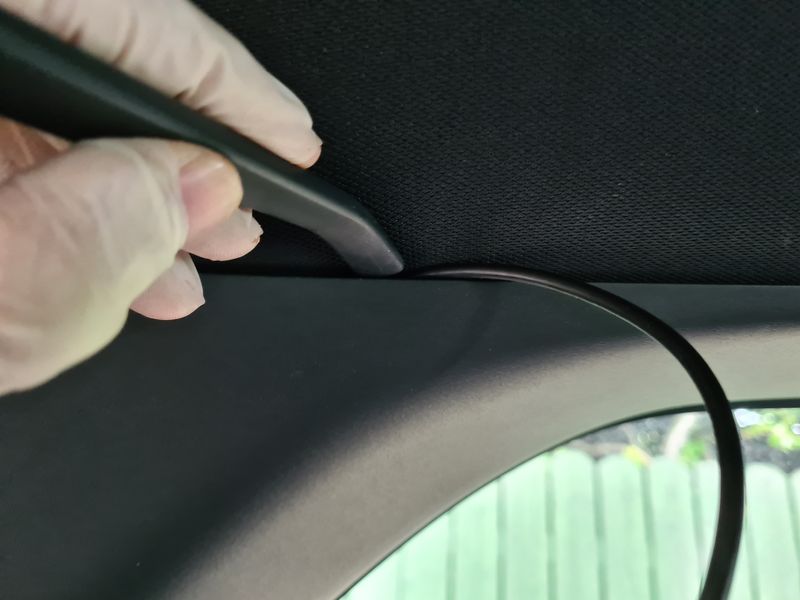
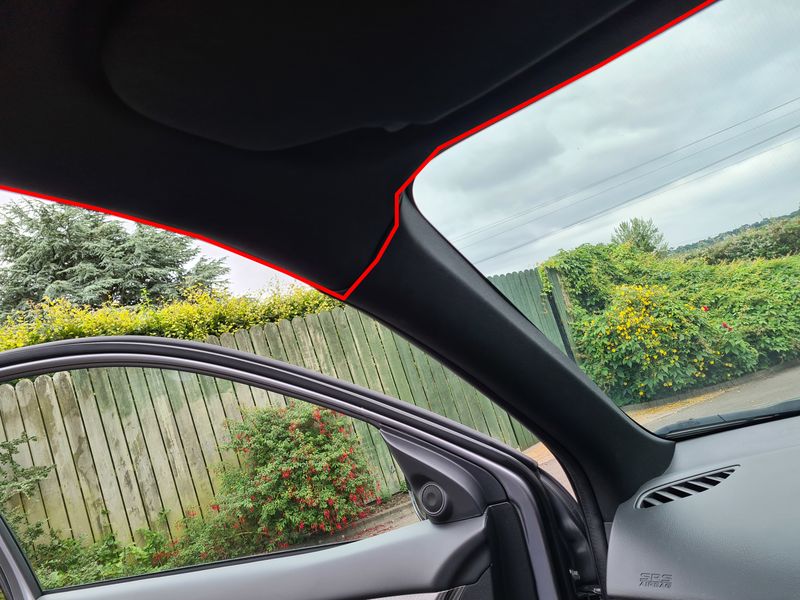
The front cable needs to be routed from the fuse panel behind the glove box to a socket on the right-hand side of the camera. It was easier to route the camera from the fuse panel, behind some trim to the door seal rubber up into the door pillar.
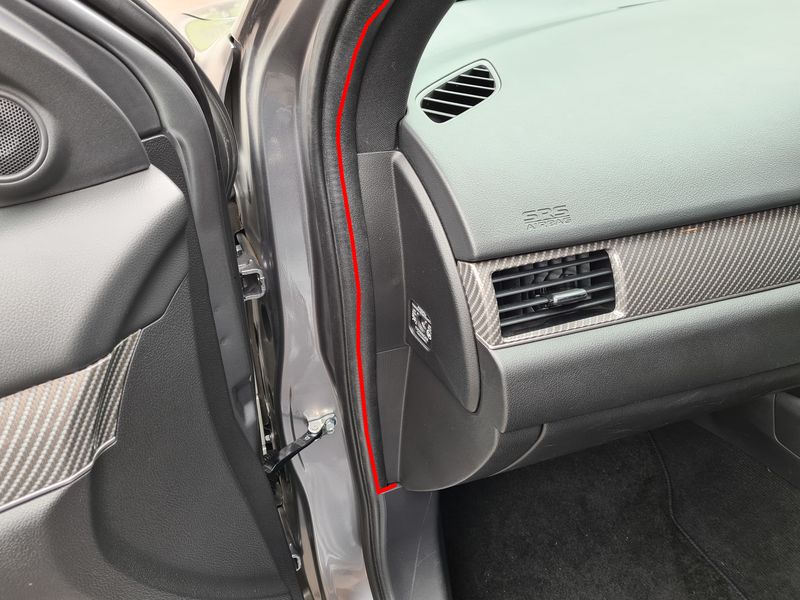
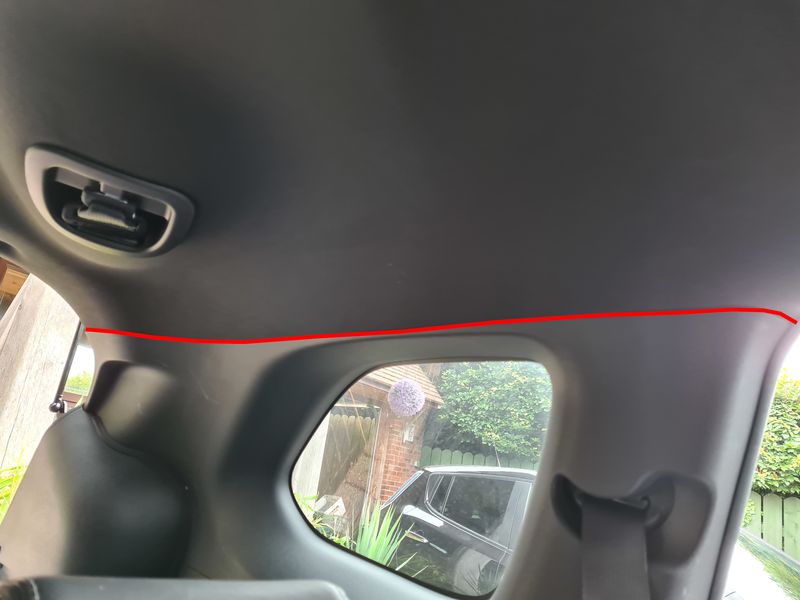
The pillar trim will pull off as it is held on with a few plastic “push-fit” clips. It’s then easy to route the cable up the pillar where it can be pushed behind the headlining until it reaches the camera.
With a bit of adjustment I made sure the excess cable ended up in the fuse panel area rather than the door pillar or headlining.
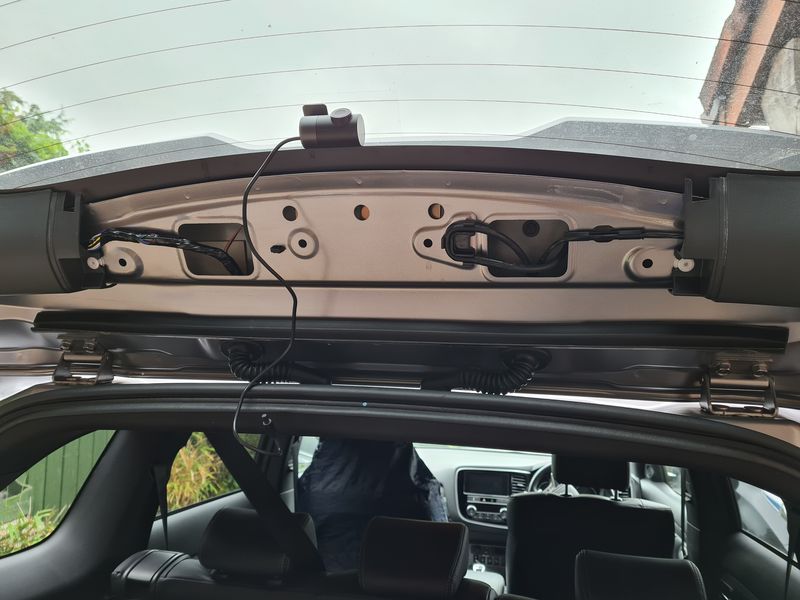
Rear Outlander Dash Cam
The rear camera was stuck onto the rear glass via the supplied anti-static sticker.
Rear Camera Cable Routing
The trim panel on the tailgate pulls off with a bit of a tug. It is held on with fasteners.
This allows the cable to be fed through the hole in the metal work.
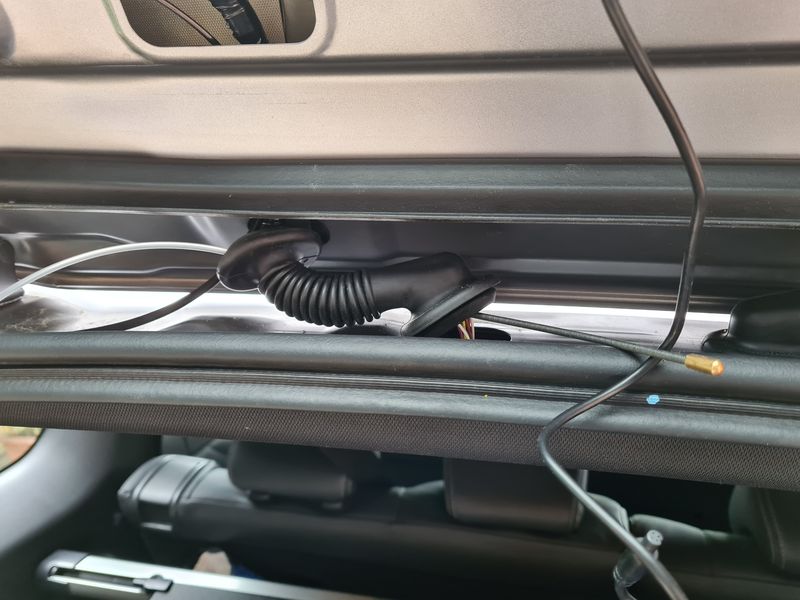
Using a flexible cable fishing tool I was able to feed the cable through the rubber cable tube. This was quite tricky and it is worth taking your time to avoid damaging the rubber or the other cables within it. If you haven’t got a cable “fishing” tool you can probably use a plastic cable tie.
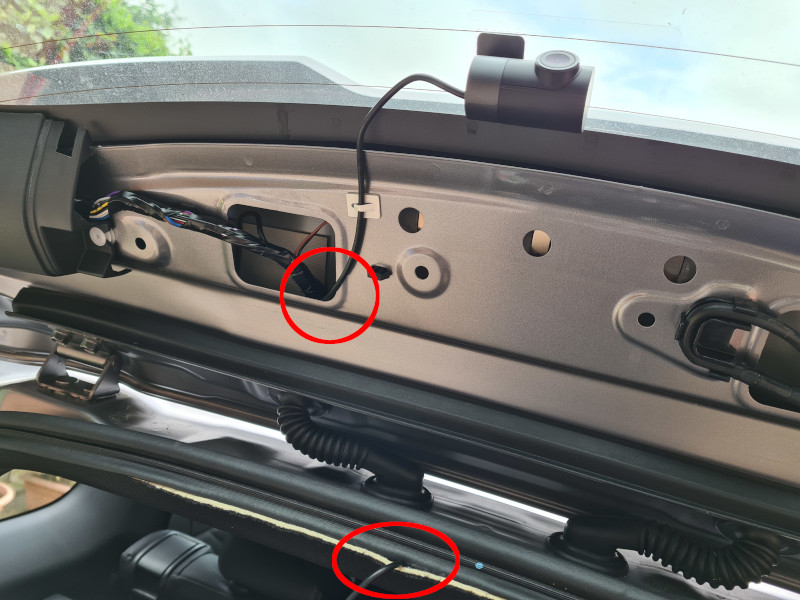
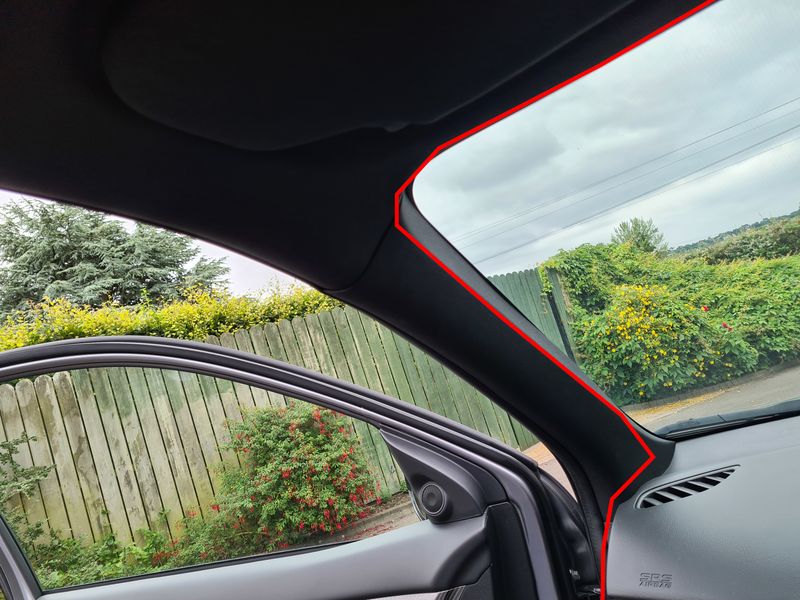
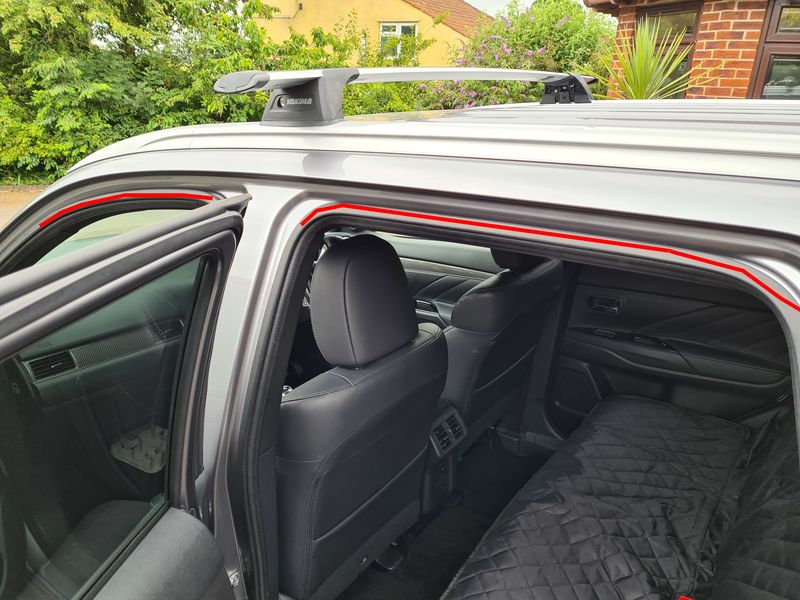
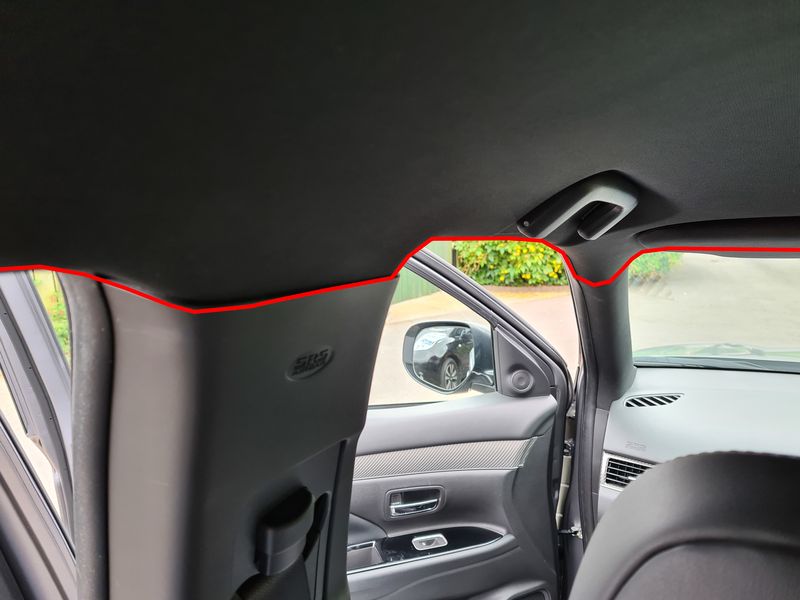
Lifting the rubber door seal allowed me to get the cable into the headlining. Then the cable could be routed under the rubber seal to the rear passenger side pillar trim.
The camera comes with a plastic tool which allows you to push the cable behind the pillar trim.
Then it’s just a case of running the cable via the trim and door seals to the front door pillar.
The rear camera cable ends up at the front camera and plugs into a socket on the right hand side. The supplied cable is longer than required. I adjusted the cabling so that the slack was hidden behind the rear pillar trim area.
Next Steps
When you start the car the camera will startup. There are number of settings you can tweak. This is best done via the 70mai app and WiFi. When you turn the car off the camera will tell you verbally it will go into parking mode after five minutes. This is all explained in the manual.
The only thing you really need to get right is ensuring that the camera are angled properly. This might require you to download some clips from the app and then adjust the cameras as required.
Useful Links
- Buy a 70mai Pro Plus Dash Cam (Front + Rear) [AliExpress affiliate link]
- Fuse Taps [eBay affiliate link]
- Fuse Taps [Amazon affiliate link]
- Kingston High Endurance 64GB SDCard [Amazon affiliate link]
- Official 70mai Pro Plus page
Finally if you are after any other Outlander accessories I can recommend this Amazon list maintained by Richi who admins the Mitsubishi Outlander UK Facebook group: amazon.co.uk/shop/richi
5 Comments
Just wanted to say thank you so much for this post. It was tremendously helpful and saved me a ton of time getting my dashcam hardwired in my Outlander PHEV!
Great post! It helped me a lot. First of all, I easily decided which brand to buy and secondly, installation was very easy and fast thanks to the brilliant description from the author. Thank you a lot!!!
Fitted this dashcam in my Outlander using these instructions. Spot On!
Hi. I used 360 Omni on a 2015 Phev. I did everything as per your post. The cam will not turn on, on ACC 5bit only on vcc. I only want to use acc. I wonder if it is a faulty wiring kit?
This was excellent, luckily I have the same car so this save me hours in figuring it all out myself , got it done in 2 hours start to finish. Im in the https://www.facebook.com/groups/outlanderphevuk/. Group too. If it’s not in the FAQs already it would be great to add a link to this there as I found it independently
Thanks for such a detailed how to post