
Home Assistant server monitoring is easy to setup. If you have other devices on your network or web servers on the internet you can display their availability in Home Assistant. To do this you can either check the availability of a public web page or ping the server.
This tutorial assumes you have a working Home Assistant system and you have the File Editor add-on installed. The technique works well for web-servers as well as computers running on your own network that respond to network pings.
The idea is to end up with your servers and/or devices represented in one or more cards within the Home Assistant interface:
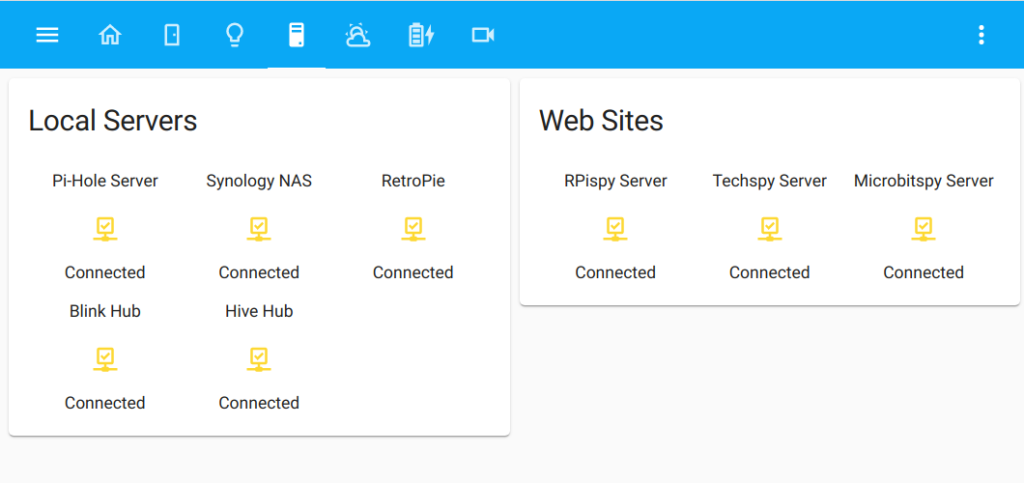
If the device is not available it will show as “Disconnected” and the colour of the icon will change.
Create Binary Sensors
There are two ways you can check that a server is available. One is to ping it if it is on your local network. The other is to access a public html page and check the page loads as expected with a HTTP 200 response code. Both these techniques can be achieved using Binary Sensors.
To monitor your servers you will need to add some binary sensors to your configuration.yaml file. Instructions for editing this file can be found on the Home Assistant site.
If you haven’t already got a “binary_sensors:” heading then add one using the File Editor add-on.
Local Server using Ping Integration
To ping a local network device you can use the “ping” integration. Add the following text to your configuration file under the “binary_sensor” heading:
binary_sensor:
  - platform: ping
    host: 192.168.1.2
    name: 'Pi-Hole Server'
    count: 5
    scan_interval: 60
In this example my Pi-Hole server is using the IP address 192.168.1.2. “count” is the number of data packets to send and “scan_interval” is the number of seconds to wait before checking again. If you exclude the “scan_interval” parameter it will default to 5 minutes (300 seconds).
This technique works best for devices with a fixed IP address. It can also be used for devices on the internet as long as they will respond to a ping with a known IP address.
Remote Web-server using Command Line Integration
To check the availability of a web-server on the public internet you can use the “command_line” integration. This allows you to call a system command that provides an “on” or “off” response.
The command is:
curl -m 10 -s -I https://example.com/ | grep -c "HTTP/2 200" > /dev/null && echo "ON" || echo "OFF"It uses the popular “curl” command to request a page from the specified URL.
Add this text to your configuration file under the “binary_sensor” heading:
binary_sensor:
  - platform: command_line
    name: 'Example Server'
    device_class: connectivity
    command: 'curl -m 10 -s -I https://www.example.com/ | grep -c "HTTP/2 200" > /dev/null && echo "ON" || echo "OFF"'
    scan_interval: 120
In this example “https://example.com/” is your site’s URL. The -m option sets the timeout value. The -s option is for silent mode. The -I option asks curl to only retrieve the HTML headers. If the response from the site includes “HTTP/2 200” then the command returns “ON”. Otherwise it returns “OFF”.
The device class “connectivity” will translate the ON/OFF states to “Connected/Disconnected” in the interface as well as automatically using a suitable icon.
Example configuration.yaml file
As an example here is the binary_sensor block from my configuration.yaml file. You’ll notice that you can add multiple sensor blocks under the same “binary_sensor” heading. You can use a selection of “command_line” and “ping” sensors.
binary_sensor:
  - platform: command_line
    name: 'server_techspy'
    device_class: connectivity
    command: 'curl -m 10 -s -I https://www.tech-spy.co.uk/ | grep -c "HTTP/2 200" > /dev/null && echo "ON" || echo "OFF"'
    scan_interval: 120
  - platform: command_line
    name: 'server_rpispy'
    device_class: connectivity
    command: 'curl -m 10 -s -I https://www.raspberrypi-spy.co.uk/ | grep -c "HTTP/2 200" > /dev/null && echo "ON" || echo "OFF"'
    scan_interval: 120
  - platform: ping
    host: 192.168.178.2
    name: server_pihole
    count: 5
    scan_interval: 60
Here we have three binary sensors. Two check the availability of some web-sites and the last one checks the availability of a Pi-Hole device.
Ensure that you indent the lines to match the rest of your configuration file. “binary_sensor:” has no indentation but the “- platform:” blocks do. Also note that the “platform” lines have a dash in front of them.
Reboot Home Assistant
Changes to the configuration.yaml file require a reboot. This can be done using the Supervisor option in the left hand menu:
Supervisor > System Tab > Reboot Host
Wait five minutes for your Home Assistant system to reboot. Once the interface has reloaded you are ready to add a card to it to display the status of your servers.
Add card to Home Assistant interface
To add a card to the interface follow the steps below:
- Put the dashboard into UI edit mode by clicking the 3-dot icon in the top-right
- Select “Edit Dashboard”
- Click the “+Add Card” button
- Select the “Entities” card
The card properties should now be visible.
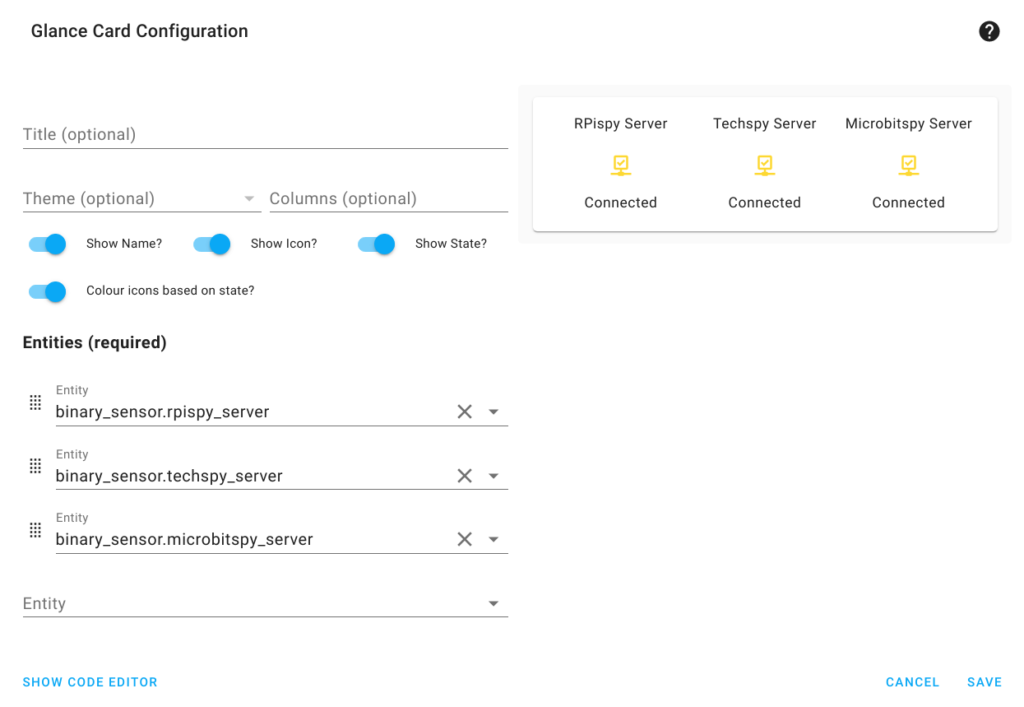
Here you can add the binary sensors you defined in the configuration.yaml file to the “Entity” entry. They should appear in the drop-down lists as binary_sensor.#### where #### is the name you gave the sensor in the config file.
At this point you can change the card’s title and when you are happy click “Save”.
To take the interface out of UI edit mode click the cross icon in the top left hand corner.
Finally you should now have a card with your Binary Sensors shown. The state will change if Home Assistant fails to contact the sites using curl or ping.
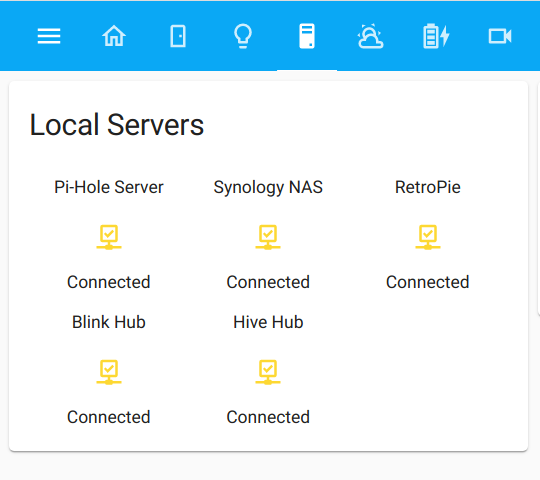
If you click on the items it will pull-up the history for that item.